SSO Authentication with SAML
You can use the Security Assertion Markup Language (SAML) protocol to authenticate users in Druid via single sign-on (SSO). Druid supports any Identity Provider (IDP), including custom implementations. Once SAML is configured, users can sign in through a secure link displayed in their chat session.
How Does SAML Work?
The SAML protocol allows secure exchange of authentication information between your identity provider and Druid. Here’s a simplified flow:
- A user clicks a login link in the web chat.
- Druid redirects the user to your IDP's authentication endpoint.
- The IDP authenticates the user and generates a SAML response.
- The response is returned to Druid and processed.
- If the authentication is successful, the user continues in the conversation as an authenticated user.
Druid holds the authentication session per conversation ID.
Configure the SAML SSO App
To use SAML authentication in Druid, first create and configure a SAML app.
Step 1. Create a SAML App
To create a new OAuth2 app:
- In the Druid Portal, go to Solution Contents > Apps.
- Click Create App and select SamlSso.
- On the New app page, configure the following parameters:
- Encryption Key – click the Generate button to generate the key, which will be used by the Encrypt Data task to encrypt the data and by the client / 3rd party application to decrypt the data and use it further.
- Secure encryption with salt – adds a random 64-bits salt to the data before encrypting it. Please note that using this feature requires the client to develop code for data decryption.
- Save the SAML app.
- Copy the Callback URL and Issuer and make sure your IdP can access them.
|
Parameter |
Description |
Mandatory |
|---|---|---|
|
Code |
Unique name to identify the app. |
Yes |
|
Execution Time |
The maximum number of seconds a request is allowed to execute. By default, the timeout for all connector integrations is 60 seconds. This setting will apply to all connector tasks that use this app. |
No |
|
Encryption Type |
Enables data encryption on the connector using the AES CGM encryption algorithm and allows authors to encrypt specific data before sending it to external REST apps, by using the Encrypt Data integration task as first task in the desired connector action. When you select AES CGM encryption algorithm (the only one currently available), two new options are available: For more information, see Encrypt Data. |
No |
| Base URL | The metadata URL provided by your IdP. | Yes |
| Callback URL | The URL where Druid expects the response from the IdP. The field is non-editable. | Yes |
| Landing Page | The Druid-hosted login and consent page. At runtime, when a user clicks the login link in the chat, Druid redirects them to this page. The field is non-editable. | Yes |
| Issuer Metadata URL |
The URL that the Identity Provider (IdP) uses to verify SAML AuthnRequests sent by Druid when requests are signed with Druid’s certificate. The field is non-editable. |
No |
Step 2. Define Sign In integration
The Sign-In action is required for user authentication. This integration processes the request and response data from the identity provider (IdP) and maps the required values back to Druid. For example, you can map the employee ID to use it for authentication.
To create a sign in with SAML integration, follow these steps:
- In the SAML app configuration page, click the add icon next to the Sign In field. The Connector Action page appears on the Connector general tab.
- Provide a Name, Description and Category and select Is Active.
- Click Save. The page refreshes and displays on the Connector steps tab.
- At the top-right corner of the page, click the Create task button and select SignInSamlSso. The Edit Connector Action page appears on the General tab.
- Enter a Description and from the Connection Code drop-down, select the new SAML app app you created.
- Click on the Request tab. The integration Request is responsible for adjusting the SAMLRequest that Druid sends to the IdP. By default, the request is generated, compressed, and URL-encoded, but not signed. If you have advanced XML knowledge, you can customize the XML in the request as needed.
- Click on the Response tab. The integration Response is responsible for extracting metadata from the SAMLResponse received from the IdP and passing the required information to Druid entities.
- Click Save & Close.
- Publish the integrations.
Sign SAML AuthnRequests
requestEntity.SamlSsoRequestUrl = App.SignSAMLRequest(requestEntity.SamlSsoRequestUrl, requestId);Map the XML response returned by your identity provider (IdP). Druid provides a sample script to help you get started. Make sure you extract and assign all user attributes needed for your flow or system (for example, email, role, or username).
Step 3: Link the Sign In action to the SAML App
- Return to the SAML app configuration page.
- In the Sign In field, select the integration you created at Step 2.
- Click Save & Close.
- Publish the apps.
Signing in users with SAML
To prompt users to sign in using SAML:
- Go to the flow where you want to perform the authentication.
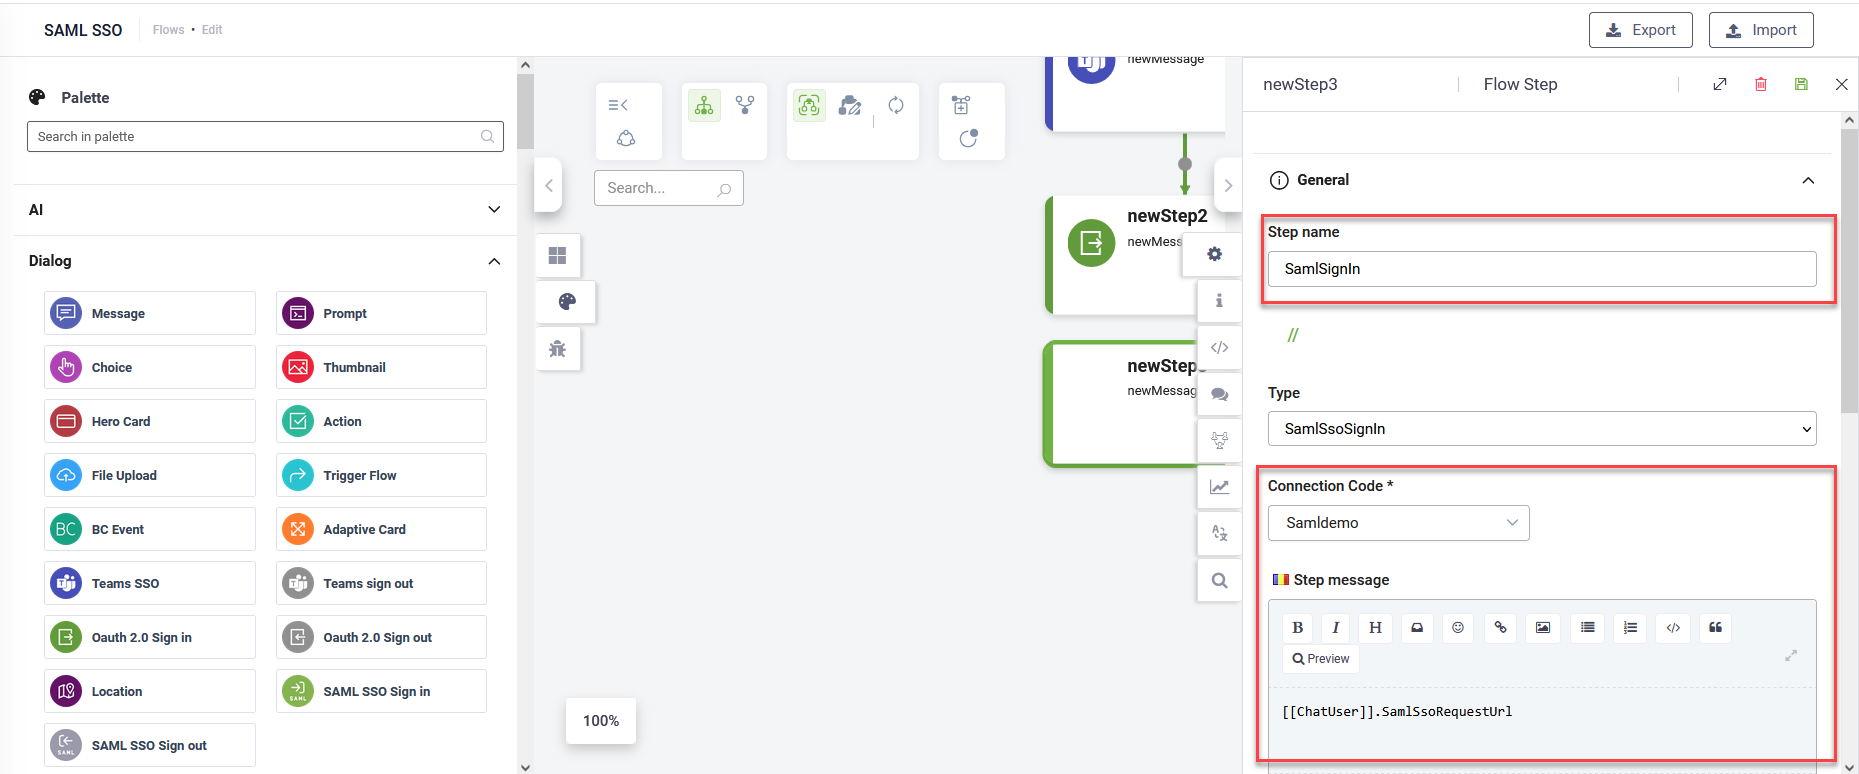
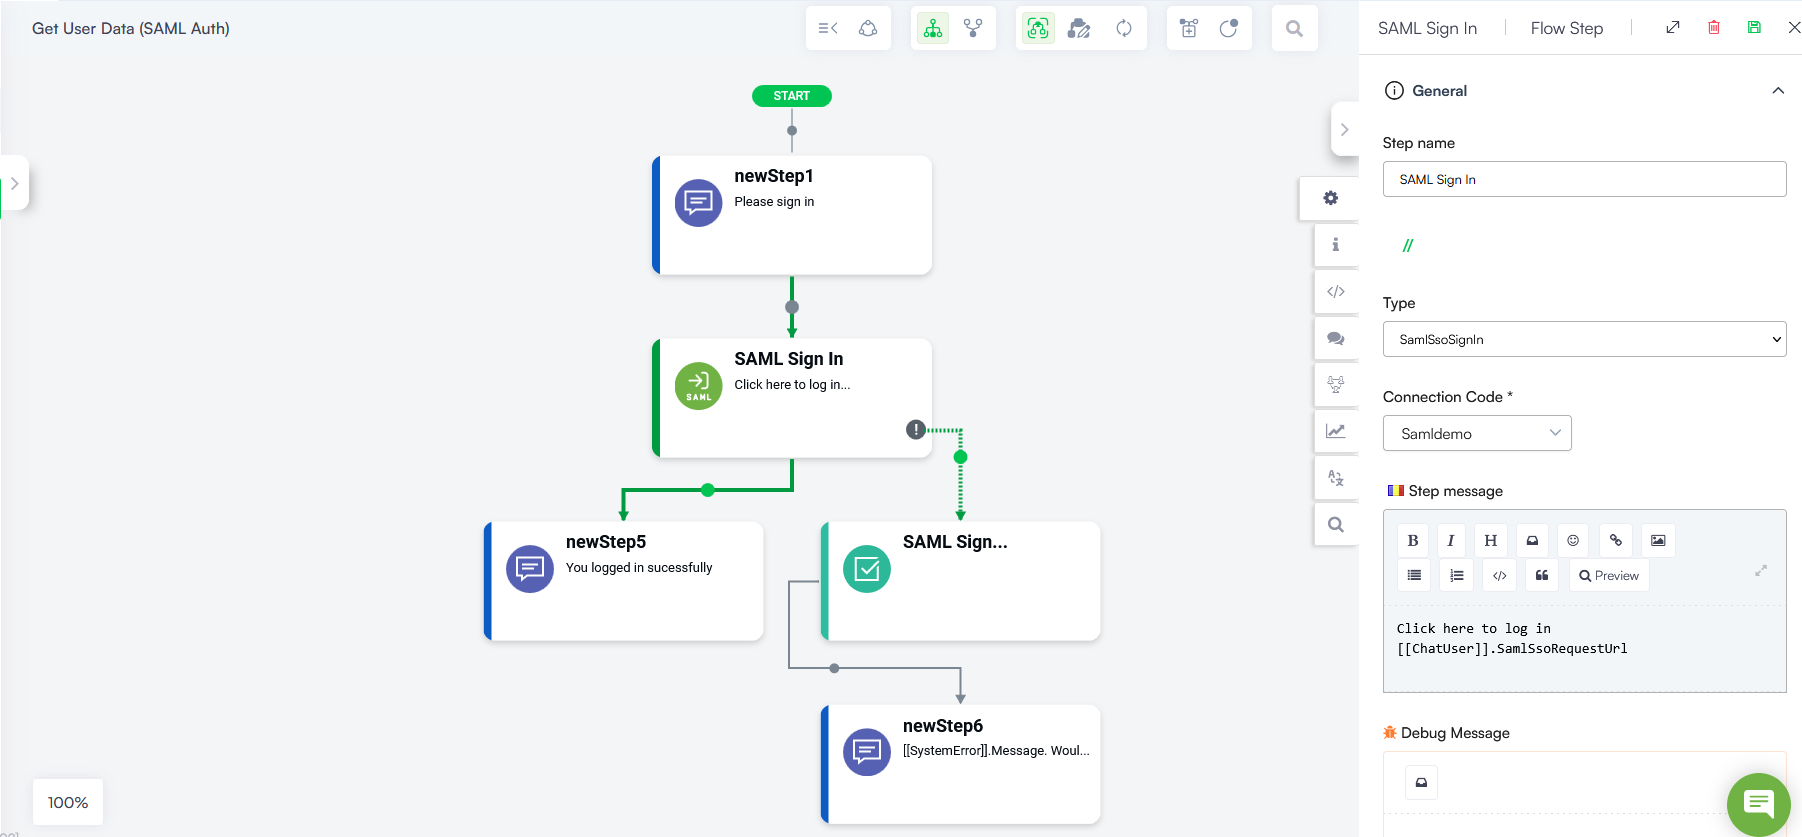
- From the Flow Palette, drag the SAML SSO Sign in step from the Dialog section.
- Drop it into your desired location within the flow.
- Configure the step as follows:
- Enter a step name.
- From the Connection Code drop-down, select the SAML connector app you created.
- In the Step message field, enter
[[ChatUser]].SamlSsoRequestUrl. - Save the step.
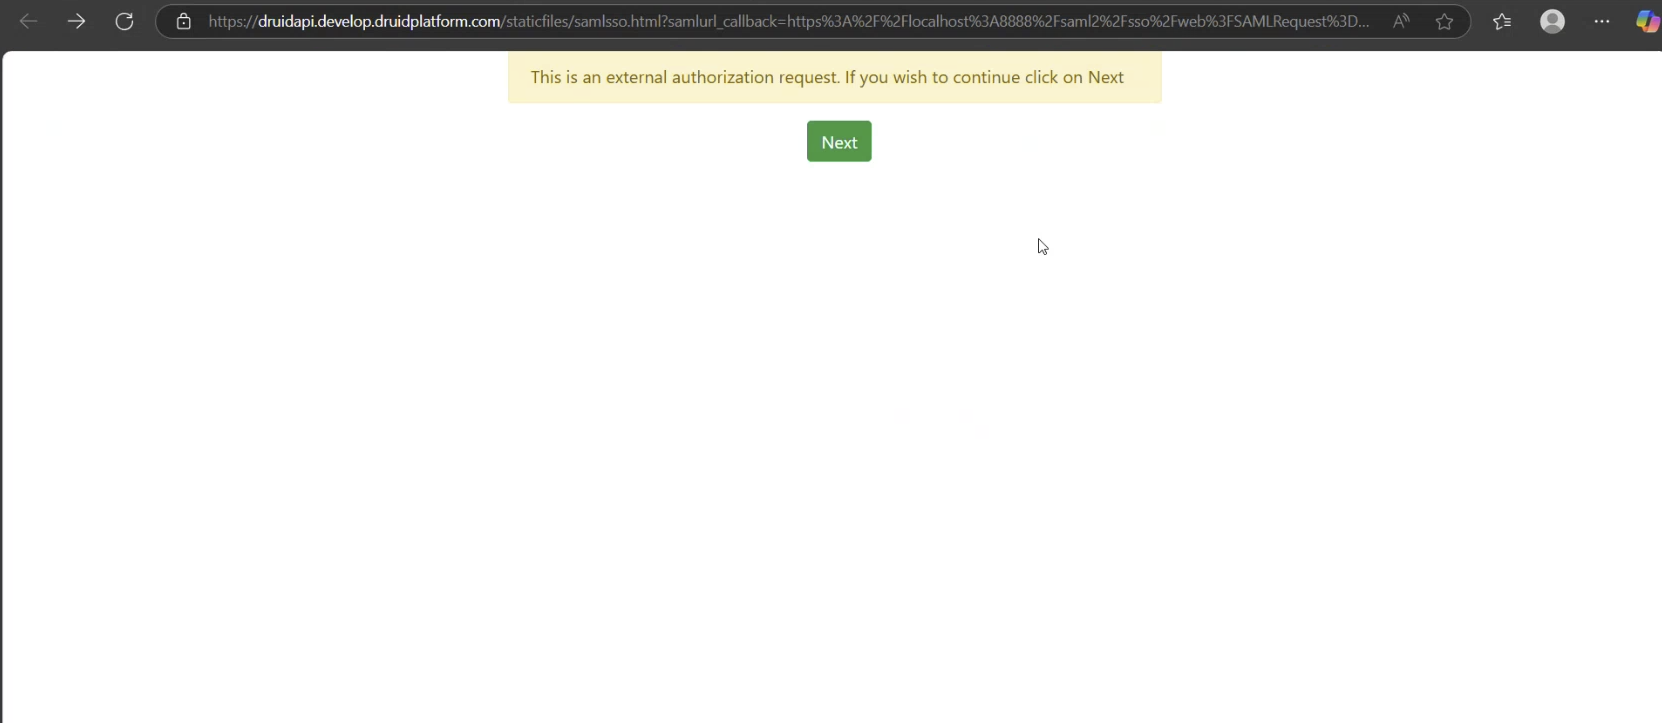
At runtime, when the user clicks the link in the chat, Druid redirects them to a Druid-hosted login/consent page at the WEB API service.
After the SAML SSO Sign In step, continue with Druid-specific authentication using internal actions such as SaveIdentifiedUser and SaveAuthenticatedUser. You can configure these either in the next step of the flow or in the PostActions section of the SAML SSO Sign In step.
Authentication Timeout Management
To prevent the conversation from becoming unresponsive if a user does not complete the sign-in process, the Flow Engine includes an automated timeout mechanism. This ensures the flow does not remain blocked until the user manually selects Cancel.
How it works
The authentication session is active for 120 seconds from the moment the sign-in link is generated in the chat. If the user fails to authenticate within this window:
- The system triggers a failure state instead of remaining stuck in the sign-in step.
- The Flow Engine raises a specific exception that can be caught and handled within the flow.
Handling the Timeout Exception
To manage the conversation path when a SSO timeout occurs:
- Open the SAML 2.0 Sign in step and go to the Metadata section.
- Enable the Exception Handler.
- Create a flow path for when the exception is raised. Recommended actions include:
- Retry logic. Ask the user if they wish to receive a new sign-in link.
- Custom notification. Inform the user that the authentication window has expired and provide instructions for the next steps.
- Redirection. Move the user to a different part of the conversation or back to the main menu.
Signing out users authenticated with SAML SSO
There’s no special sign-out process for users authenticated with SAML SSO. To sign out a user, in your flow add a step that either uses the internal action SaveNotAuthenticatedUser or sets [[ChatUser]].IsAnonymous to true.